
Robot Mower Installation & Service
 How do you properly install a robot mower? We provide answers and have prepared a step-by-step guide. So, you’ve purchased a lawn robot from Bosch, Worx, Gardena, Husqvarna, or other brands, but you’re having trouble understanding the manufacturer’s instructions? Not a problem! Here, we explain to you step-by-step how to install a robot mower. Additionally, we answer frequently asked questions and provide information on the costs of professional setup or installation services by a robot mower installer.
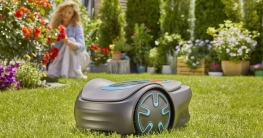
Especially for older individuals, an installation service with a dedicated contact person is recommended so that they can quickly receive competent help with any questions or maintenance work even after the installation. As an alternative, a robot mower without a perimeter wire can be mentioned, as its installation is significantly easier.
For a smooth installation with a dedicated contact person, we recommend getting a non-binding quote from a professional robot mower installation-service: » Get your robot mower installed now*
Here is our installation guide – we will start with the necessary tools and equipment, then move on to the preparation, and finally provide you with a step-by-step guide. We wish you success in installing your robot mower and enjoy using your new equipment!
What is needed for the installation?
First, let’s begin with our installation guide. In this guide, we assume that you have purchased a robot mower that comes with all the necessary accessories (charging station, hooks, induction loop, etc.). If this is not the case, you should first purchase the following items before proceeding with the installation.
The robot mower accessories should include:
- Charging station
- Mounting hooks
- Power cable
- Signal cable
- Contact clamps
- Ground screws
- Spacing gauge
In addition, you will need the following tools:
- Metal pliers
- Rubber/ plastic hammer
- Hex key
- Possibly a lawn edger
Installing the robot mower: Preparation
When installing the robot mower, you should first have the manufacturer’s user manual ready, even if it didn’t seem helpful at first glance. In the manual, you will find information on whether the perimeter wire should be installed above or below ground, and what distances need to be maintained, among other things.
In our guide, we will explain to you how both the above-ground installation and the underground installation work. Ultimately, the only difference between the two variants during installation is in step 4.
Step-by-step guide
Step 1: Mow the lawn
Although it may sound strange, you need to mow the lawn manually one last time. After all, the perimeter wire will be placed directly above or in the ground later, and tall grass could interfere with that.
Step 2: “Clean up”
Next, you should remove anything that could obstruct the robot mower while mowing the lawn. This includes toys, furniture, tools, as well as stones or branches.
In addition, water accumulation in the ground can cause damage to the mower’s electronics. Therefore, you should dry out these wet areas and possibly level them so that rainwater does not collect there again.
Step 3: Place the charging station
Now, choose a location for the charging station that meets the following four criteria:
- There is a power outlet nearby.
- The ground is level and not too steep.
- The station is protected from the weather by a shelter.
- There is enough space around the charging station.
Important:
Do not anchor the station in the ground yet!
Tip:
If you have found a suitable spot without shelter, you can also purchase a so-called robot mower garage for around $130 or build one yourself.
Step 4: Installing the signal cable
Next, the signal cable is installed. As described above, there are two ways to install it:
Above-ground

Start the installation of the signal cable at one side of the charging station. Define the perimeter of the lawn area so that the cable ends at the desired point.
Always maintain the distance from the edge of the lawn as specified by the manufacturer and ensure that the cable has a certain tension. Secure it using plastic hooks.
Underground
Follow the same steps as with above-ground installation. However, instead of placing the signal cable above the ground, use a lawn edger to create a groove where you can lay the cable. Fill the groove back with soil to finish.
Note:
The signal cable must be laid around flower beds. Large stones, trees, or shrubs, on the other hand, can be within the mowing area as the robot will detect them automatically.
Step 5: Connecting the signal cable
After laying the cable, you need to connect the contact clamps to the end of the cable and insert them into the designated slots on the charging station.
Step 6: Securing the charging station
In the next step, you can anchor the station to the ground using the provided ground screws.
Step 7: Power supply
To start the operation, simply connect the power supply to an electrical outlet.
Step 8: Adjusting settings
Finally, the robot mower needs to be configured. Use the user manual to set the mowing times and theft protection.
That’s it! The robot lawn mower is now ready to work fully automatically.
Robot Mower Installer 2024: Cost for a Service
Many older or working individuals often hesitate to purchase a robot mower due to the perceived complicated installation process. Especially for older individuals, it is strongly recommended to consider using an installation service or laying service. The costs vary depending on factors such as travel distance (flat rates), garden size and condition, and the specific robot mower models, which is why you can simply request a non-binding quote if interested. In general, the costs are reasonable and provide long-term benefits.
Many manufacturers also offer an installation service, but this service provided by the manufacturers themselves can typically be expensive. Therefore, it is advisable to opt for an independent installation service with qualified personnel.
Laying Service: What to Expect?
Above all, with a professional laying service, you will always have a competent contact person even after the installation, who will be available to assist you with any questions or issues. After all, robot mowers are complex devices that require regular maintenance and some care. However, the pure installation service or laying service initially includes the following points.
The Robot Mower Installation Service:
- Travel
- Unpacking & Assembly
- Professional laying of the perimeter & search cable
- Setup & Programming
- Test run
- Instruction on how to operate the robot
Installation Service: Get Your Robot Mower Installed by a Professional
If you prefer not to attempt the installation of the robot mower yourself for any reason, you can also seek help from a professional or robot mower installer. For this, we can recommend the exclusive and non-binding offer from our service partner. This saves a lot of time and effort, and you will always have a competent contact person afterward.

No Comments found